Exactly 4 points
Help the farmers (+2), delay the land purchase (0), find Jestyn's criticism funny (+2), and skip the chocolate (0).
Total: 4 · Collar availableAct 1 walkthrough · Choice spoilers · Updated 14 October 2026
The creator lists four Act 1 decisions with affection values. This walkthrough turns those values into complete example routes, so you can choose a good ending, see the bad ending, or reach Jestyn's collar option without guessing.
These points come from the creator's February 2026 Act 1 ending guide. They are not a confirmed Act 2 route map. The secret ending has a different name-entry trigger, covered in the Crownus guide. A browser build may also differ from the current desktop release.
The scene names below are navigation aids; the choice directions and numbers paraphrase the creator's published guide. Other story moments may appear between these decisions.

| Decision | Positive or neutral answer | Point loss to watch for |
|---|---|---|
| Help the farmers | Offer money, water channels, or new seeds: +2. Ask for time: 0. | Leave them to solve it themselves: −1. |
| Buy the land? | Refuse: +1. Delay: 0. | Agree to buy: −1. |
| Jestyn's criticism | Find it funny: +2. | Find it annoying: 0. Neutral is not a penalty, but it misses two points. |
| Chocolate | Do not eat it: 0. | Eat it: −1. |
For a regular ending, add these four values. 3 or more reaches the good ending; 2 or less reaches the bad ending. The collar scene option requires 4 or more. The creator describes the secret route separately.
Total: 3 · Good ending threshold
This example proves you do not need every positive answer for the regular good ending. It does not meet the 4-point collar condition. If you wanted the collar scene, change the criticism response to “funny” or use the route below.
The collar is a scene choice within the Act 1 route, not a fourth ending in the creator's feature list. Its threshold is one point higher than the good ending's.
Help the farmers (+2), delay the land purchase (0), find Jestyn's criticism funny (+2), and skip the chocolate (0).
Total: 4 · Collar availableHelp the farmers (+2), refuse the land purchase (+1), find the criticism funny (+2), and skip the chocolate (0).
Total: 5 · Collar available
If you finish on 3 points, the good ending can still be available while the collar choice is absent. That difference is easy to miss when following a generic “good route” tip.
A common surprise is helping the farmers but still falling below the good-ending threshold. For example, help them (+2), agree to buy the land (−1), find the criticism annoying (0), and decline the chocolate (0): the total is 1, so the published rule gives the bad ending.
Total: 1 · Bad ending threshold
If you intentionally want to see that outcome, the example above stays within the four documented choices. For a later good-ending run, the simplest fix is to refuse the land purchase (+1 instead of −1); that two-point swing changes the example total from 1 to 3.
Choose your answers and see the regular ending threshold and collar condition.
Open the point calculator →Follow the room-door clue and the exact name-entry step without confusing it with affection points.
Read the Crownus guide →Creator-confirmed: Thepipi's February ending post provides the four scored decisions, good and bad thresholds, the four-point collar gate, and the name that locks the secret ending. Those are the hard rules used in every calculation below. Player-tested: the optional opening order, Knighter encounter, and some name reactions come from ADVaNCE VN and MysteryCorgi's Day 1 playthrough and code inspection. Visual observation: captions describe the ten local captures visible on this site. An image of a scene is not evidence for a hidden point value. Where this page interprets why an answer matters to the story, it says so as interpretation rather than an extra rule.
This is a spoiler-heavy guide to the released Day 1 or Act 1 material. The official game listing describes a newly hired guard at an abandoned puppet theatre, tasked with keeping intruders away, cleaning, and checking that the puppets stay put. It describes Jestyn as a living jester puppet interested in the guard. That premise explains why the same playthrough shifts between a security routine and theatrical roleplay; the official ending post, rather than the premise, is what supports the outcome arithmetic.
The creator's premise begins with ordinary security work in an extraordinary place. The player character is hired to watch an abandoned puppet theatre, keep troublemakers out, clean the building, and notice if a puppet wanders. This matters to a first-time player because the opening should be read as an investigation of a workplace, not as a test of reflexes or an action-combat tutorial. Read the instructions and the environment. The theatre's stage, storage area, cameras, and puppet rooms are part of the narrative vocabulary that later choices build on. Nothing in the creator's ending post awards affection points simply for moving through these opening checks.
The player-tested Day 1 guide suggests checking the puppets, cleaning, and checking CCTV before the encounter sequence. These are useful orientation steps because they make the guard's job concrete. They are not a creator-published list of mandatory flags for the good ending, and the four-point ending arithmetic starts later in the roleplay. If you are replaying a familiar opening, note which task you last completed and whether you are at a monitor, a corridor, storage, or the stage. That is more reliable than using the mere presence of Jestyn to identify where you are in a branch.
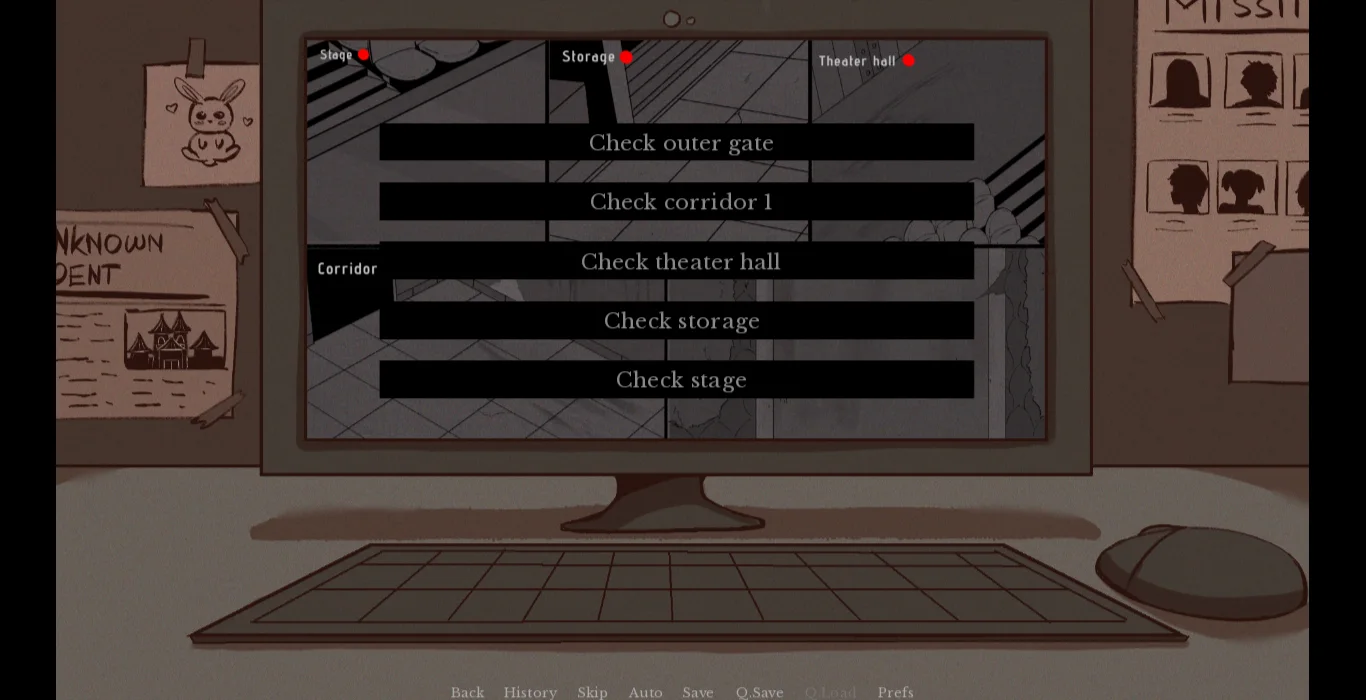
The local monitor screenshot shows a list of places to inspect, including the outer gate, corridor, storage, stage, and rooms. It establishes that the game presents location selection through a screen interface. It does not show a final ending choice or prove that selecting a location grants a point. If your goal is to see different dialogue, location order can be interesting to replay. If your goal is a particular published ending, keep the location experiment separate from the four scored answers and record those four explicitly.
A player-tested walkthrough describes an optional Knighter encounter through the storage check and an encounter with Jestyn through the stage check. In the storage path, its suggested sequence is to remain silent or ask who the stranger is, then run to reach Jestyn. In the stage path, the jester is met more directly. These are reported navigation examples from a third-party guide, not an official guarantee that every build or every combination will display identical wording. A new player can use them to orient themselves without mistaking them for the affection-point system.
The difference between these entrances is useful for replay. If you met Knighter first, a later line that speaks as though Jestyn was the first puppet can sound inconsistent; readers on the creator's page have reported that continuity issue. Treat that as a dialogue observation, not proof that a route is broken. If the point-scored roleplay still appears, the four-answer total remains the confirmed way to explain the Act 1 regular outcome. For a clean comparison, save before the location choice, visit storage on one run and stage on another, then compare the encounter dialogue before changing your roleplay answers.
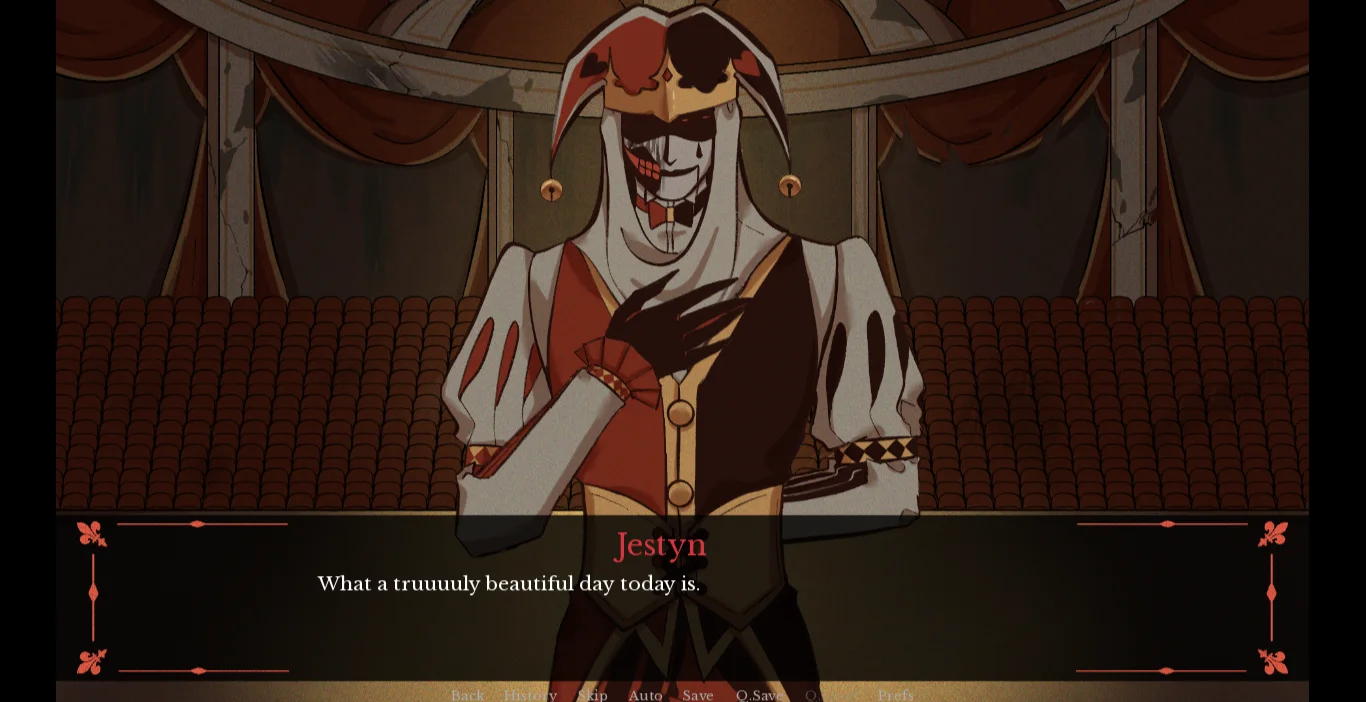
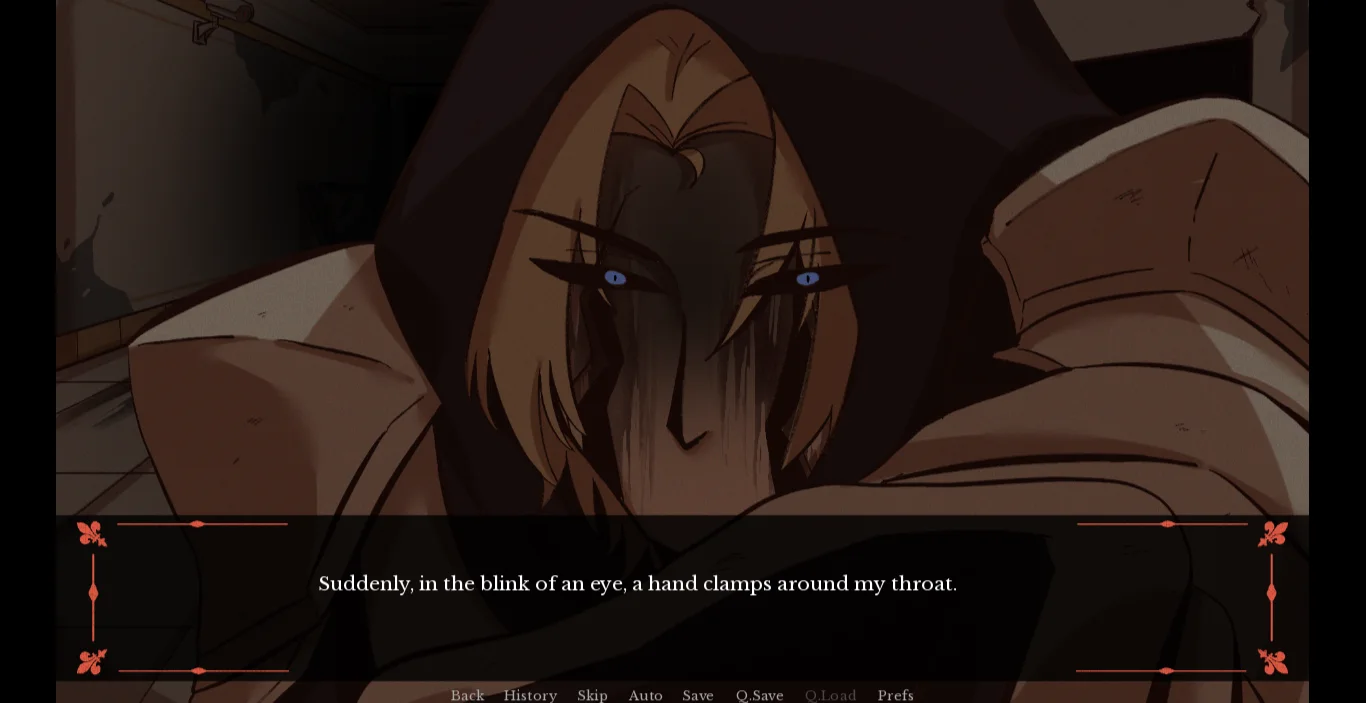
The stage captures show the theatre seats, red curtains, and Jestyn speaking directly to the player. They make the visual-novel format clear: dialogue and deliberate choices carry the experience. A close-up of a puppet, a threatening line, or an animated image may make a moment feel decisive, but the creator only published numerical values for four later decisions. Keep emotional intensity and mechanical scoring separate when writing down a route.
The four documented questions are presented inside a performance about ruling a kingdom: the farmers' plight, a proposed land purchase, Jestyn's criticism, and a piece of chocolate. The creator's list gives a different value to each answer. This structure rewards a coherent combination of judgement and response to Jestyn rather than one isolated kind gesture. You can help the farmers and still lose enough points elsewhere for the bad ending. You can also skip the most flattering answer to Jestyn yet reach the ordinary good ending if the earlier decisions are strong enough.
It helps to distinguish a scene's story meaning from the published mechanic. A response about irrigation or seed supply sounds practical, and the creator confirms that these answers earn two points. Refusing the purchase earns one point. Calling the criticism funny earns two. Declining the chocolate preserves the total. Descriptions such as 'wise ruler', 'trusting guard', or 'Jestyn approves of independence' are interpretations of those values and dialogue, not extra scores. This guide uses the numbers for outcomes and reserves character readings for clearly labelled analysis.
There are four scored moments, but more than four possible answers. The three concrete ways to help the farmers all give the same +2; neither the ending post nor the player-tested guide establishes a different final ending for money versus channels versus seeds. For the regular good/bad calculation, they are mechanically interchangeable. You can still replay all three to hear the writing and see whether a particular response fits the ruler you are roleplaying. Do not promise a different ending merely because the prose of these helpful answers differs.
The farmers ask for help during a drought. The creator assigns +2 to giving money, building water channels, or providing new seeds. Asking for time is an unmarked, zero-point response; leaving the solution to the farmers costs one point. If you want the largest buffer for the good ending, select any of the three concrete aid options. If you want to see how a hesitant ruler is treated, asking for time is a valid story choice, but you must recover points at the land decision and Jestyn's criticism if the good ending remains your aim.
This is the largest early swing in the published score. The gap between practical help and dismissal is three points. Since the good-ending threshold is three, choosing dismissal forces you to collect the maximum +1 at the land problem and +2 at the criticism to reach exactly two even before the chocolate penalty. That is still below the good threshold. In other words, under the four published values, the dismissive answer cannot reach the regular good ending. This conclusion is arithmetic, and it is stronger than a vague instruction to 'be nice': it tells you why a later perfect answer cannot repair that particular decision.
If you are comparing the three +2 solutions, think of them as three styles of aid, not three secret point tiers. Money is immediate relief, channels suggest infrastructure, and seeds suggest a future harvest; those are readings of the choice text, not claims of different hidden flags. The safe mechanical statement is that all three have the same value. A screenshot of the empty stage and the narrator's drought introduction gives context for the problem but does not display the actual answer menu, so the exact values here come from Thepipi's guide.
When the land purchase problem arrives, refusing earns +1, delaying has no listed change, and agreeing costs one point. This two-point difference between refusal and agreement is often the simplest explanation for a surprising result. If a run helped the farmers (+2), found the criticism annoying (0), and declined the chocolate (0), refusing gives a final 3 and a good ending; agreeing gives 1 and a bad ending. The two runs differ at a single answer. Keep a note of the land decision if you are testing an outcome.
The name of the scene can be misleading when summarized too quickly. 'Purchase land' is a problem posed in the roleplay, not a real-world purchase or a game economy screen. The creator's point chart cares about agree, refuse, or delay. It does not publish a currency balance, a debt mechanic, or a fifth scored answer. Any reading of why refusal is favored belongs to interpretation. The practical guide instruction is simpler: for a secure good route, refuse. For an exactly four-point collar route, delaying can be useful when paired with help and a funny response.
If you are deliberately exploring the bad ending, agreeing is a controlled way to lose one point. Pair it with the helping answer and a neutral criticism response for a total of one when the chocolate is declined. This lets you observe a lower-score outcome while keeping the farmer scene constant. If you also eat the chocolate, the total drops to zero. The visible narrative may differ, but the ending threshold prediction follows the creator's four values.
The creator lists two reactions to Jestyn's criticism. Finding it funny adds +2; finding it annoying has no listed point change. The neutral response is not a hidden negative score. That distinction is important because an annoyed answer can still coexist with a good ending: help the farmers (+2), refuse the land purchase (+1), decline the chocolate (0), and the total is three. The same route cannot meet the four-point collar gate without changing one of its earlier choices, because its total is already at the maximum available without the funny response.
If you are starting from a weak score, the +2 funny answer is the main recovery opportunity. For example, helping the farmers and agreeing to buy land leaves one point before Jestyn's criticism; finding it funny raises the total to three, so declining the chocolate preserves a good ending. If you eat the chocolate, the same path returns to two and falls to the bad threshold. This example demonstrates why planning only the first two decisions can fail. The fourth answer can still remove the slim margin you just created.
Calling a criticism funny may read as rapport, defiance, or a willingness to play along depending on the surrounding dialogue. The exact psychological reading is not encoded in the published point table. Treat the +2 as the fact and any character analysis as a way to understand tone. If your priority is a specific numerical result, choose by total rather than by whether a line sounds emotionally warm in isolation.
The creator explicitly describes the chocolate as Jestyn's prank and advises players not to eat it. Eating subtracts one point; declining is unmarked and therefore adds zero. The chocolate is the only one of the four decisions that cannot raise the score. Its role in a route planner is to preserve a threshold or pull an otherwise successful route beneath it. If you arrive with three points, eating leaves two and changes the regular result from good to bad. If you arrive with four, eating leaves three: the regular good ending remains, while the collar gate is lost.
This produces a useful diagnostic. When a player says that the good ending appeared but the collar did not, the chocolate can be the one-point difference if the earlier score was four. When a player says that helping the farmers and finding Jestyn funny should have guaranteed everything, check the land decision and chocolate together. Help (+2) plus funny (+2) gives four before those two modifiers. Buying land and eating chocolate subtract two, leaving two. The order of scenes does not change that total.
Nothing in the creator's score list says that declining the chocolate gives a bonus, unlocks a separate chocolate ending, or blocks a later Act 2 route. It simply avoids a one-point loss in this Act 1 calculation. Keep the written score sheet exact. An invented 'trust point' for declining would make the guide mathematically wrong and would overstate what the published post confirms.
For a regular Act 1 finish, three or more points reaches the good ending and two or fewer reaches the bad ending. The optional collar scene requires at least four. These conditions create three practical score bands: two or less is bad; exactly three is good without the collar option; four or more is good with that option available. The creator describes the collar as a choice within a scene where the player can choose balls or collar. It is not listed as a fourth ending in the official feature list.
The maximum listed score is five: +2 for helping the farmers, +1 for refusing the land, +2 for finding Jestyn's criticism funny, and zero for declining the chocolate. The minimum is negative three: −1 for dismissing the farmers, −1 for agreeing to buy land, zero for the annoyed response, and −1 for eating the chocolate. A negative total is possible by arithmetic; this page does not claim that the game displays a negative number on screen. The score is a planning tool derived from the creator's published values.
A four-point route need not choose every highest-value answer. Help (+2), delay the purchase (0), find the criticism funny (+2), and decline the chocolate (0) totals four. Help (+2), refuse (+1), find the criticism funny (+2), and eat the chocolate (−1) also totals four. The latter meets the numeric collar condition even though the creator advises against eating the chocolate. If your goal is a clear, low-risk replay, the five-point route is easier to remember; the alternative is useful when verifying the threshold.
Thepipi's secret-ending instruction begins at the puppet rooms: inspect the writing on the King puppet's door, then enter crownus when Jestyn asks for your name. The creator says that doing so locks the run into the secret ending. It should not be treated as an extra affection point, and a high regular score should not be expected to cancel it. If you want to compare good and bad endings, use another name and keep the four decision totals visible in your notes. If you want the secret route, inspect the clue and enter the specified name on a separate save.
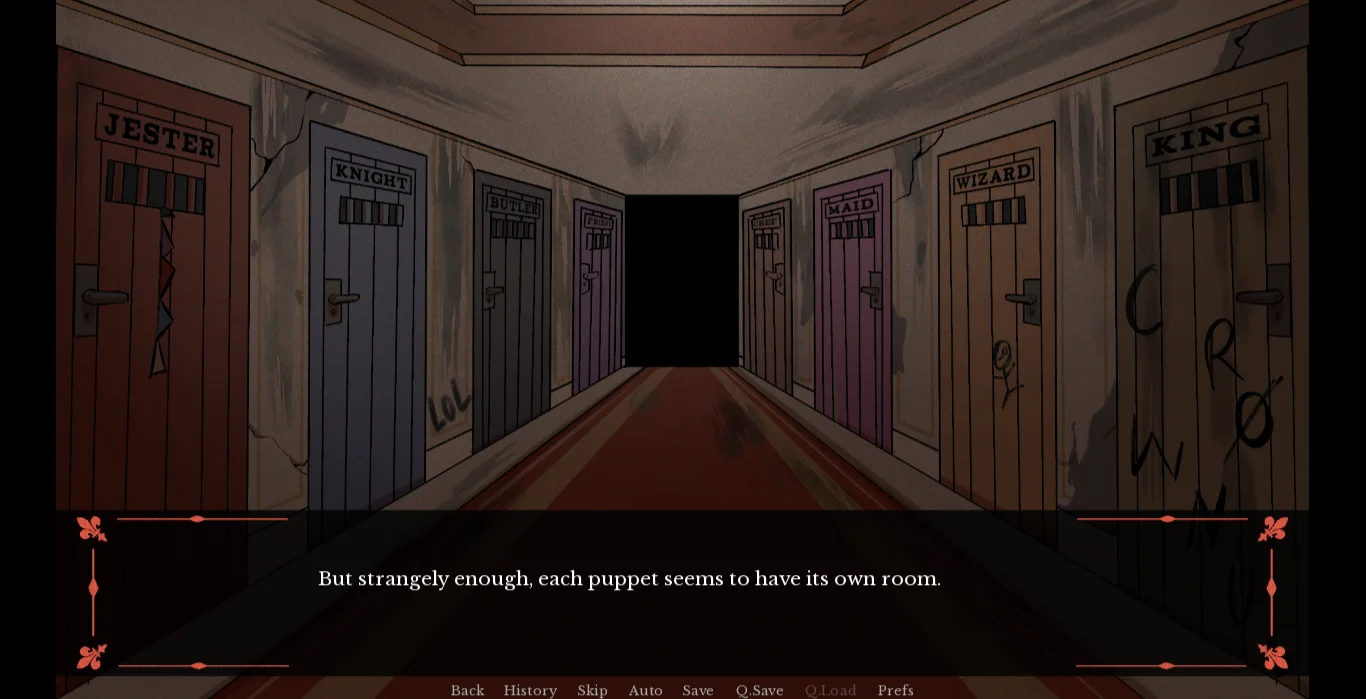
The corridor screenshot shows doors labelled for several puppets and a King door at the end. The image demonstrates where the clue belongs in the theatre's geography; it does not itself reveal the name clearly enough to serve as a substitute for the in-game inspection. A guide can responsibly describe the sequence because the creator published it. It should avoid promising that merely standing in the corridor, or typing the name before the relevant prompt, triggers the same branch. The timing of the input matters in the published instruction.
The creator also invites players to try other puppet names and see Jestyn's reactions. A player-tested guide reports particular name Easter eggs, but those reactions are distinct from the confirmed Crownus secret-ending lock. If you explore names, use a fresh save and distinguish a line of special dialogue from an ending route. Do not rely on a cute or hostile reaction alone as proof that you have entered a hidden finale.
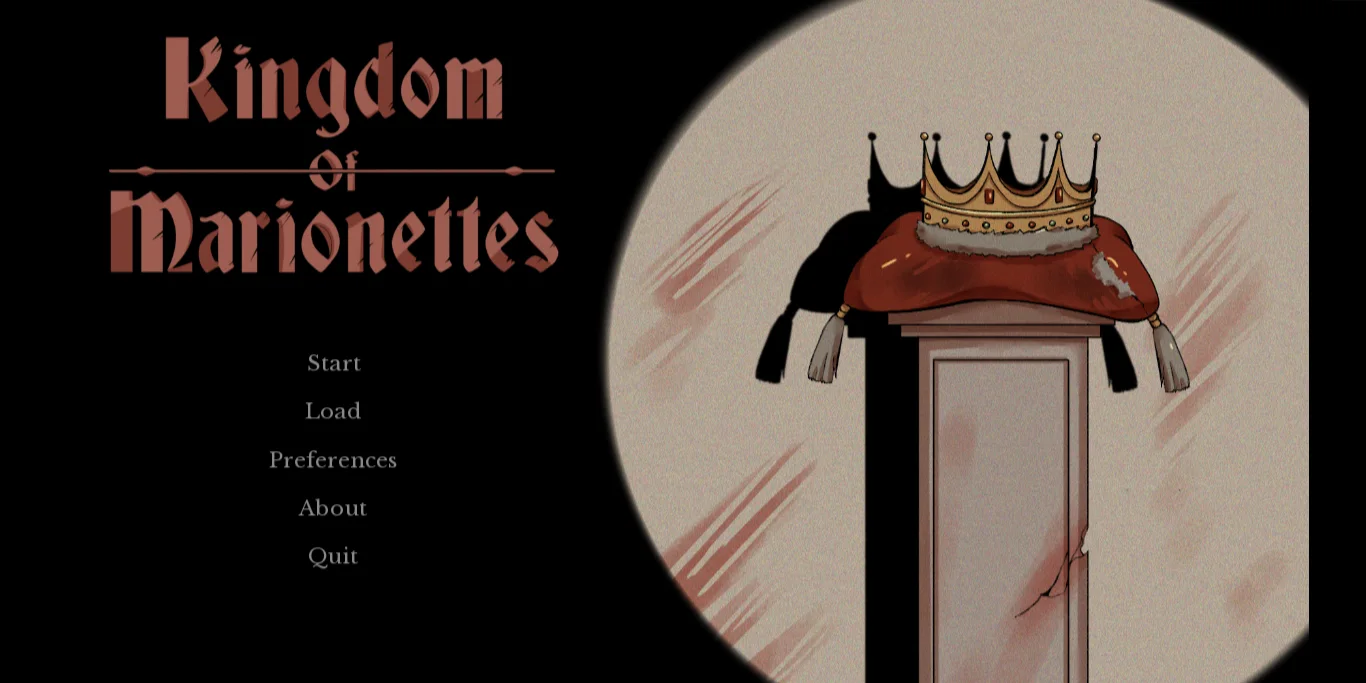
The image gallery below uses ten existing, distinct local captures of Kingdom of Marionettes. They are screenshots of title, monitor, stage, puppet corridor, character encounter, and collar or ending scenes. None was generated for this article. Some belong to different moments or builds, so they are visual references rather than a claim that the images form a complete chronological photo essay. In particular, the first large screenshot carries an ending overlay and should not be mistaken for the ordinary opening state of a new run.
A screenshot caption should report only what can be seen. The monitor image shows location choices, not the result of selecting one. The corridor image shows named doors, not the text of every clue. The collar image shows a red collar and a golden bell, not the hidden score counter. The +4 gate comes from the creator's ending post. This separation matters when a player tries to reproduce a route: a picture is a landmark, while a cited rule is a mechanic.
Visual framing also helps a reader understand why the game is classed as a visual novel. The stage background persists while a character portrait and dialogue text change; choices are read and selected, rather than fought through. The security monitor and named doors introduce exploratory interfaces without turning the game into a free-roaming action title. These observations support practical advice: read slowly, save before a prompt, and note exact response categories when calculating an ending.
Start with a run aimed at the good ending: choose a concrete aid for the farmers, refuse the land purchase, find Jestyn's criticism funny, and decline the chocolate. This gives five, the highest listed total, so it clears both the regular good and collar gates. Save before the name-entry prompt if the game permits it, but use a name other than Crownus for this comparison run. Record whether the collar choice actually appears in your build; the creator's numerical rule predicts that it should.
For a controlled bad-ending comparison, hold as much of the route steady as possible. One compact example is help (+2), agree to buy land (−1), annoyed (0), decline chocolate (0), total one. Another is ask for time (0), refuse land (+1), annoyed (0), decline chocolate (0), total one. These examples reach the same band through different decisions. Watching both can reveal different local dialogue without changing the published ending threshold. If you only want one bad run, choose the first and keep your previous helpful opening.
For the secret route, begin a separate run or load a save before the name choice. Inspect the King puppet's door and enter crownus when Jestyn asks the player character's name. The creator's instruction says this locks the secret ending. Do not mix this result with a score experiment: a route that enters that name and then receives the secret ending does not disprove the good/bad threshold, because it has taken a separate branch. Mark the save clearly so later Act 2 testing does not confuse regular and secret progress.
If you helped the farmers but saw the bad ending, reconstruct the entire score. Helping supplies two, which is one short of the good threshold. Agreeing to buy land lowers it to one, eating chocolate can lower it again, and an annoyed response does not repair the gap. A good ending after the helping response still requires at least one more net point. Refusing land is enough if chocolate is declined; alternatively, a funny response can compensate for buying land if chocolate is declined.
If you saw a good ending but no collar choice, your total may have been exactly three. The standard good threshold and collar gate differ by one. Calculate the choices rather than assuming the scene should appear whenever the regular ending is favorable. A three-point example is help, refuse, annoyed, decline chocolate. Another is help, buy land, funny, decline chocolate. Both are good under the published rule, and both miss the collar requirement.
If you cannot reproduce a community walkthrough's exact opening dialogue, first verify the build and path. The official point post covers the score and secret name but not every line in the guard's first checks. A player-tested route can provide useful landmarks without guaranteeing identical dialogue across releases. Note whether you entered through stage or storage and whether you are using the Act 2 desktop package, the older Android package, or this site's browser player. The Act 1 score remains the cited baseline; presentation differences should be investigated separately.
If a name reaction seems special but you do not reach the secret ending, compare what you entered with the creator's exact trigger and timing. Jestyn can react to some puppet names without that reaction being the Crownus ending. The official instruction requires the King-door clue and the name crownus at the prompt. Returning to the four-score table will not repair a name-entry mistake because the name branch is separate.
For ending arithmetic, the three +2 farmer answers are one mechanical category. Combining that category with the neutral and negative farmer answers, three land answers, two criticism answers, and two chocolate answers produces 36 distinct score patterns. Expand the case matching your run. The same regular ending can have different local dialogue; these cards predict the published thresholds, not every line in the script.
Calculation: +2 + +1 + +2 + +0 = +5. Under Thepipi’s Act 1 thresholds this is the good ending, collar available. This is the highest score described by the four published decisions. It offers the largest margin above both thresholds, provided the separate secret name is not entered.
Replay adjustment: For a lower-score comparison, change one answer at a time and recalculate; this isolates dialogue variation from the ending threshold. This is arithmetic from the official chart, not a report of a separate ending animation for every combination.
Calculation: +2 + +1 + +2 + -1 = +4. Under Thepipi’s Act 1 thresholds this is the good ending, collar available. This run sits exactly on the collar boundary. One lost point would keep the good ending but remove the collar option; two lost points would reach the bad-ending band.
Replay adjustment: For a lower-score comparison, change one answer at a time and recalculate; this isolates dialogue variation from the ending threshold. This is arithmetic from the official chart, not a report of a separate ending animation for every combination.
Calculation: +2 + +1 + +0 + +0 = +3. Under Thepipi’s Act 1 thresholds this is the good ending, no collar. This run sits exactly on the good-ending boundary. Losing a single point anywhere would change the regular result; the collar choice remains below its four-point gate.
Replay adjustment: For the collar scene, find at least one additional point: the funny criticism response is the biggest available gain when it was skipped. This is arithmetic from the official chart, not a report of a separate ending animation for every combination.
Calculation: +2 + +1 + +0 + -1 = +2. Under Thepipi’s Act 1 thresholds this is the bad ending band. This run is one point short of the good ending. Changing a neutral answer to a positive one, or removing a one-point penalty, is enough if such an alternative exists in this combination.
Replay adjustment: For a good-ending replay, start by switching the land answer from agreement to refusal when applicable, then use the funny criticism response and avoid the chocolate penalty. This is arithmetic from the official chart, not a report of a separate ending animation for every combination.
Calculation: +2 + +0 + +2 + +0 = +4. Under Thepipi’s Act 1 thresholds this is the good ending, collar available. This run sits exactly on the collar boundary. One lost point would keep the good ending but remove the collar option; two lost points would reach the bad-ending band.
Replay adjustment: For a lower-score comparison, change one answer at a time and recalculate; this isolates dialogue variation from the ending threshold. This is arithmetic from the official chart, not a report of a separate ending animation for every combination.
Calculation: +2 + +0 + +2 + -1 = +3. Under Thepipi’s Act 1 thresholds this is the good ending, no collar. This run sits exactly on the good-ending boundary. Losing a single point anywhere would change the regular result; the collar choice remains below its four-point gate.
Replay adjustment: For the collar scene, find at least one additional point: the funny criticism response is the biggest available gain when it was skipped. This is arithmetic from the official chart, not a report of a separate ending animation for every combination.
Calculation: +2 + +0 + +0 + +0 = +2. Under Thepipi’s Act 1 thresholds this is the bad ending band. This run is one point short of the good ending. Changing a neutral answer to a positive one, or removing a one-point penalty, is enough if such an alternative exists in this combination.
Replay adjustment: For a good-ending replay, start by switching the land answer from agreement to refusal when applicable, then use the funny criticism response and avoid the chocolate penalty. This is arithmetic from the official chart, not a report of a separate ending animation for every combination.
Calculation: +2 + +0 + +0 + -1 = +1. Under Thepipi’s Act 1 thresholds this is the bad ending band. This run is below the good threshold. Compare the named negative answers and the missed positive answers before changing several decisions at once.
Replay adjustment: For a good-ending replay, start by switching the land answer from agreement to refusal when applicable, then use the funny criticism response and avoid the chocolate penalty. This is arithmetic from the official chart, not a report of a separate ending animation for every combination.
Calculation: +2 + -1 + +2 + +0 = +3. Under Thepipi’s Act 1 thresholds this is the good ending, no collar. This run sits exactly on the good-ending boundary. Losing a single point anywhere would change the regular result; the collar choice remains below its four-point gate.
Replay adjustment: For the collar scene, find at least one additional point: the funny criticism response is the biggest available gain when it was skipped. This is arithmetic from the official chart, not a report of a separate ending animation for every combination.
Calculation: +2 + -1 + +2 + -1 = +2. Under Thepipi’s Act 1 thresholds this is the bad ending band. This run is one point short of the good ending. Changing a neutral answer to a positive one, or removing a one-point penalty, is enough if such an alternative exists in this combination.
Replay adjustment: For a good-ending replay, start by switching the land answer from agreement to refusal when applicable, then use the funny criticism response and avoid the chocolate penalty. This is arithmetic from the official chart, not a report of a separate ending animation for every combination.
Calculation: +2 + -1 + +0 + +0 = +1. Under Thepipi’s Act 1 thresholds this is the bad ending band. This run is below the good threshold. Compare the named negative answers and the missed positive answers before changing several decisions at once.
Replay adjustment: For a good-ending replay, start by switching the land answer from agreement to refusal when applicable, then use the funny criticism response and avoid the chocolate penalty. This is arithmetic from the official chart, not a report of a separate ending animation for every combination.
Calculation: +2 + -1 + +0 + -1 = +0. Under Thepipi’s Act 1 thresholds this is the bad ending band. This run is below the good threshold. Compare the named negative answers and the missed positive answers before changing several decisions at once.
Replay adjustment: For a good-ending replay, start by switching the land answer from agreement to refusal when applicable, then use the funny criticism response and avoid the chocolate penalty. This is arithmetic from the official chart, not a report of a separate ending animation for every combination.
Calculation: +0 + +1 + +2 + +0 = +3. Under Thepipi’s Act 1 thresholds this is the good ending, no collar. This run sits exactly on the good-ending boundary. Losing a single point anywhere would change the regular result; the collar choice remains below its four-point gate.
Replay adjustment: For the collar scene, find at least one additional point: the funny criticism response is the biggest available gain when it was skipped. This is arithmetic from the official chart, not a report of a separate ending animation for every combination.
Calculation: +0 + +1 + +2 + -1 = +2. Under Thepipi’s Act 1 thresholds this is the bad ending band. This run is one point short of the good ending. Changing a neutral answer to a positive one, or removing a one-point penalty, is enough if such an alternative exists in this combination.
Replay adjustment: For a good-ending replay, start by switching the land answer from agreement to refusal when applicable, then use the funny criticism response and avoid the chocolate penalty. This is arithmetic from the official chart, not a report of a separate ending animation for every combination.
Calculation: +0 + +1 + +0 + +0 = +1. Under Thepipi’s Act 1 thresholds this is the bad ending band. This run is below the good threshold. Compare the named negative answers and the missed positive answers before changing several decisions at once.
Replay adjustment: For a good-ending replay, start by switching the land answer from agreement to refusal when applicable, then use the funny criticism response and avoid the chocolate penalty. This is arithmetic from the official chart, not a report of a separate ending animation for every combination.
Calculation: +0 + +1 + +0 + -1 = +0. Under Thepipi’s Act 1 thresholds this is the bad ending band. This run is below the good threshold. Compare the named negative answers and the missed positive answers before changing several decisions at once.
Replay adjustment: For a good-ending replay, start by switching the land answer from agreement to refusal when applicable, then use the funny criticism response and avoid the chocolate penalty. This is arithmetic from the official chart, not a report of a separate ending animation for every combination.
Calculation: +0 + +0 + +2 + +0 = +2. Under Thepipi’s Act 1 thresholds this is the bad ending band. This run is one point short of the good ending. Changing a neutral answer to a positive one, or removing a one-point penalty, is enough if such an alternative exists in this combination.
Replay adjustment: For a good-ending replay, start by switching the land answer from agreement to refusal when applicable, then use the funny criticism response and avoid the chocolate penalty. This is arithmetic from the official chart, not a report of a separate ending animation for every combination.
Calculation: +0 + +0 + +2 + -1 = +1. Under Thepipi’s Act 1 thresholds this is the bad ending band. This run is below the good threshold. Compare the named negative answers and the missed positive answers before changing several decisions at once.
Replay adjustment: For a good-ending replay, start by switching the land answer from agreement to refusal when applicable, then use the funny criticism response and avoid the chocolate penalty. This is arithmetic from the official chart, not a report of a separate ending animation for every combination.
Calculation: +0 + +0 + +0 + +0 = +0. Under Thepipi’s Act 1 thresholds this is the bad ending band. This run is below the good threshold. Compare the named negative answers and the missed positive answers before changing several decisions at once.
Replay adjustment: For a good-ending replay, start by switching the land answer from agreement to refusal when applicable, then use the funny criticism response and avoid the chocolate penalty. This is arithmetic from the official chart, not a report of a separate ending animation for every combination.
Calculation: +0 + +0 + +0 + -1 = -1. Under Thepipi’s Act 1 thresholds this is the bad ending band. This run is below the good threshold. Compare the named negative answers and the missed positive answers before changing several decisions at once.
Replay adjustment: For a good-ending replay, start by switching the land answer from agreement to refusal when applicable, then use the funny criticism response and avoid the chocolate penalty. This is arithmetic from the official chart, not a report of a separate ending animation for every combination.
Calculation: +0 + -1 + +2 + +0 = +1. Under Thepipi’s Act 1 thresholds this is the bad ending band. This run is below the good threshold. Compare the named negative answers and the missed positive answers before changing several decisions at once.
Replay adjustment: For a good-ending replay, start by switching the land answer from agreement to refusal when applicable, then use the funny criticism response and avoid the chocolate penalty. This is arithmetic from the official chart, not a report of a separate ending animation for every combination.
Calculation: +0 + -1 + +2 + -1 = +0. Under Thepipi’s Act 1 thresholds this is the bad ending band. This run is below the good threshold. Compare the named negative answers and the missed positive answers before changing several decisions at once.
Replay adjustment: For a good-ending replay, start by switching the land answer from agreement to refusal when applicable, then use the funny criticism response and avoid the chocolate penalty. This is arithmetic from the official chart, not a report of a separate ending animation for every combination.
Calculation: +0 + -1 + +0 + +0 = -1. Under Thepipi’s Act 1 thresholds this is the bad ending band. This run is below the good threshold. Compare the named negative answers and the missed positive answers before changing several decisions at once.
Replay adjustment: For a good-ending replay, start by switching the land answer from agreement to refusal when applicable, then use the funny criticism response and avoid the chocolate penalty. This is arithmetic from the official chart, not a report of a separate ending animation for every combination.
Calculation: +0 + -1 + +0 + -1 = -2. Under Thepipi’s Act 1 thresholds this is the bad ending band. This run is below the good threshold. Compare the named negative answers and the missed positive answers before changing several decisions at once.
Replay adjustment: For a good-ending replay, start by switching the land answer from agreement to refusal when applicable, then use the funny criticism response and avoid the chocolate penalty. This is arithmetic from the official chart, not a report of a separate ending animation for every combination.
Calculation: -1 + +1 + +2 + +0 = +2. Under Thepipi’s Act 1 thresholds this is the bad ending band. This run is one point short of the good ending. Changing a neutral answer to a positive one, or removing a one-point penalty, is enough if such an alternative exists in this combination.
Replay adjustment: Because the farmers were dismissed, no combination of the remaining published choices can reach three; change this first for a regular good-ending attempt. This is arithmetic from the official chart, not a report of a separate ending animation for every combination.
Calculation: -1 + +1 + +2 + -1 = +1. Under Thepipi’s Act 1 thresholds this is the bad ending band. This run is below the good threshold. Compare the named negative answers and the missed positive answers before changing several decisions at once.
Replay adjustment: Because the farmers were dismissed, no combination of the remaining published choices can reach three; change this first for a regular good-ending attempt. This is arithmetic from the official chart, not a report of a separate ending animation for every combination.
Calculation: -1 + +1 + +0 + +0 = +0. Under Thepipi’s Act 1 thresholds this is the bad ending band. This run is below the good threshold. Compare the named negative answers and the missed positive answers before changing several decisions at once.
Replay adjustment: Because the farmers were dismissed, no combination of the remaining published choices can reach three; change this first for a regular good-ending attempt. This is arithmetic from the official chart, not a report of a separate ending animation for every combination.
Calculation: -1 + +1 + +0 + -1 = -1. Under Thepipi’s Act 1 thresholds this is the bad ending band. This run is below the good threshold. Compare the named negative answers and the missed positive answers before changing several decisions at once.
Replay adjustment: Because the farmers were dismissed, no combination of the remaining published choices can reach three; change this first for a regular good-ending attempt. This is arithmetic from the official chart, not a report of a separate ending animation for every combination.
Calculation: -1 + +0 + +2 + +0 = +1. Under Thepipi’s Act 1 thresholds this is the bad ending band. This run is below the good threshold. Compare the named negative answers and the missed positive answers before changing several decisions at once.
Replay adjustment: Because the farmers were dismissed, no combination of the remaining published choices can reach three; change this first for a regular good-ending attempt. This is arithmetic from the official chart, not a report of a separate ending animation for every combination.
Calculation: -1 + +0 + +2 + -1 = +0. Under Thepipi’s Act 1 thresholds this is the bad ending band. This run is below the good threshold. Compare the named negative answers and the missed positive answers before changing several decisions at once.
Replay adjustment: Because the farmers were dismissed, no combination of the remaining published choices can reach three; change this first for a regular good-ending attempt. This is arithmetic from the official chart, not a report of a separate ending animation for every combination.
Calculation: -1 + +0 + +0 + +0 = -1. Under Thepipi’s Act 1 thresholds this is the bad ending band. This run is below the good threshold. Compare the named negative answers and the missed positive answers before changing several decisions at once.
Replay adjustment: Because the farmers were dismissed, no combination of the remaining published choices can reach three; change this first for a regular good-ending attempt. This is arithmetic from the official chart, not a report of a separate ending animation for every combination.
Calculation: -1 + +0 + +0 + -1 = -2. Under Thepipi’s Act 1 thresholds this is the bad ending band. This run is below the good threshold. Compare the named negative answers and the missed positive answers before changing several decisions at once.
Replay adjustment: Because the farmers were dismissed, no combination of the remaining published choices can reach three; change this first for a regular good-ending attempt. This is arithmetic from the official chart, not a report of a separate ending animation for every combination.
Calculation: -1 + -1 + +2 + +0 = +0. Under Thepipi’s Act 1 thresholds this is the bad ending band. This run is below the good threshold. Compare the named negative answers and the missed positive answers before changing several decisions at once.
Replay adjustment: Because the farmers were dismissed, no combination of the remaining published choices can reach three; change this first for a regular good-ending attempt. This is arithmetic from the official chart, not a report of a separate ending animation for every combination.
Calculation: -1 + -1 + +2 + -1 = -1. Under Thepipi’s Act 1 thresholds this is the bad ending band. This run is below the good threshold. Compare the named negative answers and the missed positive answers before changing several decisions at once.
Replay adjustment: Because the farmers were dismissed, no combination of the remaining published choices can reach three; change this first for a regular good-ending attempt. This is arithmetic from the official chart, not a report of a separate ending animation for every combination.
Calculation: -1 + -1 + +0 + +0 = -2. Under Thepipi’s Act 1 thresholds this is the bad ending band. This run is below the good threshold. Compare the named negative answers and the missed positive answers before changing several decisions at once.
Replay adjustment: Because the farmers were dismissed, no combination of the remaining published choices can reach three; change this first for a regular good-ending attempt. This is arithmetic from the official chart, not a report of a separate ending animation for every combination.
Calculation: -1 + -1 + +0 + -1 = -3. Under Thepipi’s Act 1 thresholds this is the bad ending band. This run is below the good threshold. Compare the named negative answers and the missed positive answers before changing several decisions at once.
Replay adjustment: Because the farmers were dismissed, no combination of the remaining published choices can reach three; change this first for a regular good-ending attempt. This is arithmetic from the official chart, not a report of a separate ending animation for every combination.
These ten distinct files already exist in this site's game assets. They are screenshots from the game, not AI-generated illustrations. The title, monitor, dialogue, corridor, and choice outcome images are ordered as a visual reference rather than a promised chronological sequence. The four large JPG captures and six WebP gallery captures show different frames.



Evidence for this expanded chapter: Thepipi’s game listing and premise; Thepipi’s Act 1 ending values; and ADVaNCE VN and MysteryCorgi’s player-tested route study for optional navigation. The image files are existing game captures in this repository. Reviewed 14 October 2026.
Source: Thepipi's Act 1 ending guide. Route totals above are arithmetic from the published point values. Screenshots are existing in-game images from this site's gallery; no generated images were used.